Stage #1:
I had installed IIS on the virtual machine and created a regular site with an IP consistent with the virtual machine's IPv4 address (10.0.2.15). I had to allow port 80 to be accessible by adding an inbound rule to Windows Firewall. I was able to access the site using Microsoft edge.

Stage #2:
Before setting up the FTP site on IIS, I had to reconfigure some settings on the virtual machine to be able to use port 21. First, I had to allow the FTP Server app to communicate through Windows Defender firewall. Then, I disabled firewall for both private and guest networks to ensure that the firewall would not interfere with the connection process. After this, I set up the FTP server with an IP address consistent with my virtual machine's IPv4 address (10.0.2.15). Since "user" is the name of account on Windows 10, I gave "user" read and write permissions. I also created a new account with a username (FTP-User) and password to be able to use access the FTP site. I had to enable full control of the FTP-User on the security of the FTP storage file. I downloaded Firefox and was able to access the FTP site using the credentials of the FTP-User account. I placed three random files into the FTP site storage to test if the site will display them, as shown below.

Stage #3:
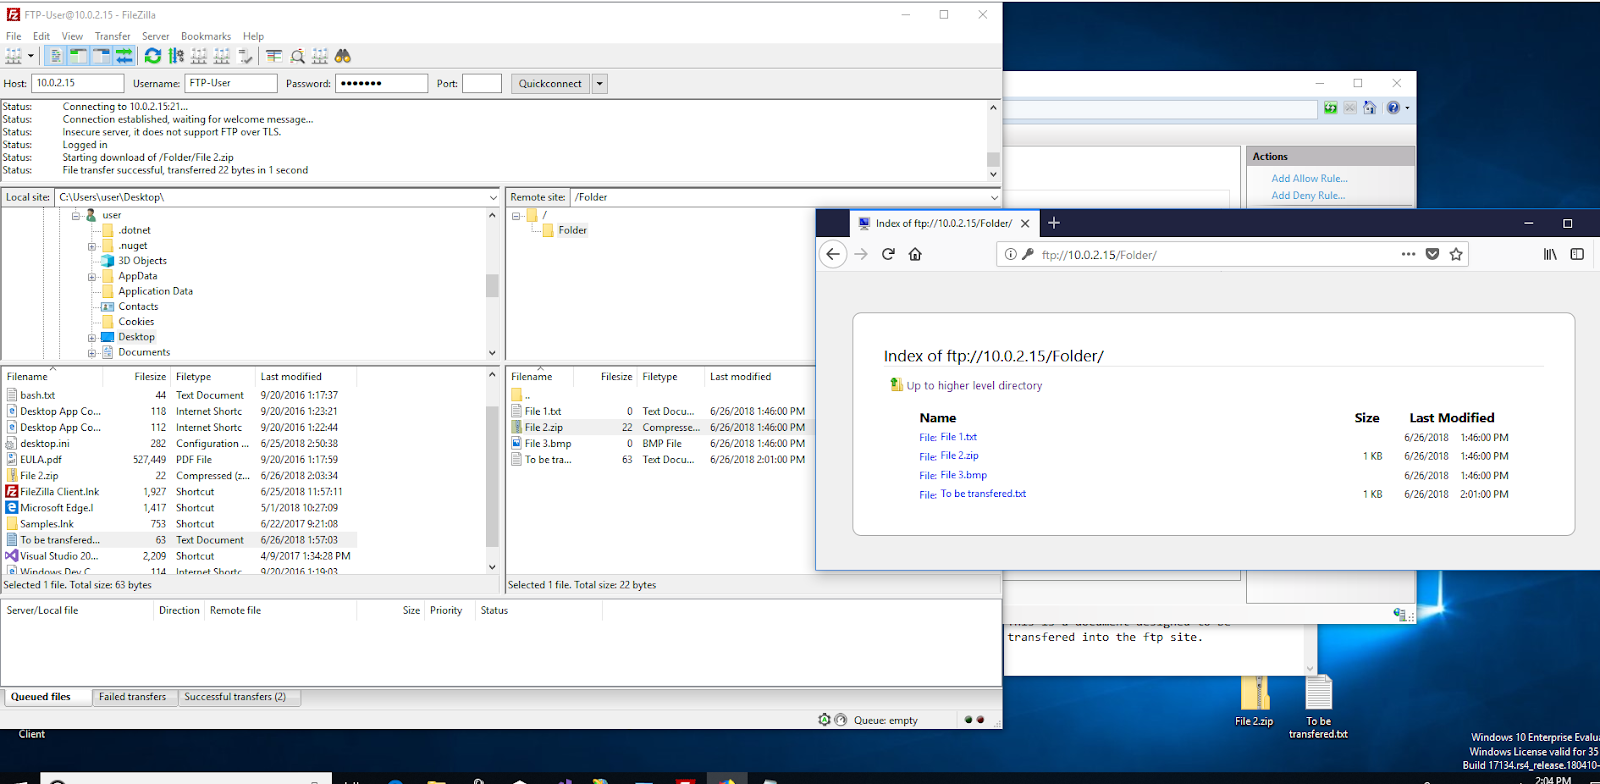
I was able to successfully establish a connection using FileZilla and access all the contents of the FTP server.

I created a file on the desktop that successfully uploaded into the FTP server through FileZilla.

I successfully downloaded File 2 onto my desktop through FileZilla.